Almost anything we do here at Raven Web Services starts with security as our first thought and for good reason. In our last article we spoke about why you needed website security and now we continue past the introductions and get into the good stuff. This article will cover WebARX, a powerful set of website security tools that we use for the large majority of our clients because it has the most bang for the buck (in our opinion).
This article gives a step-by-step tutorial on how to secure a WordPress site with WebARX. If you care about your business you need protection from hackers and for this, you need to have a complete overview of your site, the first line of defence, and an intelligence system that will let you know when there’s a risk and how to eliminate it.
In under three minutes (and with no technical knowledge), you can connect the WebARX plugin to your WordPress site and have your site protected.
Here's a complete list of WebARX Features:
- Web Application Firewall
- Website Software Overview
- GDPR Cookie and Privacy Policy
- Access to Website Firewall Logs
- Access to Website Activity Logs
- Vulnerability Scanning
- Defacement, Incident Monitoring
- SSL Monitoring
- Blacklist & Reputation Monitoring
- Site Health Monitoring
- Malvertising Monitoring
- Uptime Monitoring
- Domain Threat Intelligence (Hacker Chatter)
- Support
- Real Time Security Alerts
- Integrations (Slack)
And below is the step-by-step tutorial about how to secure a WordPress site with WebARX .
Login to the WebARX Portal
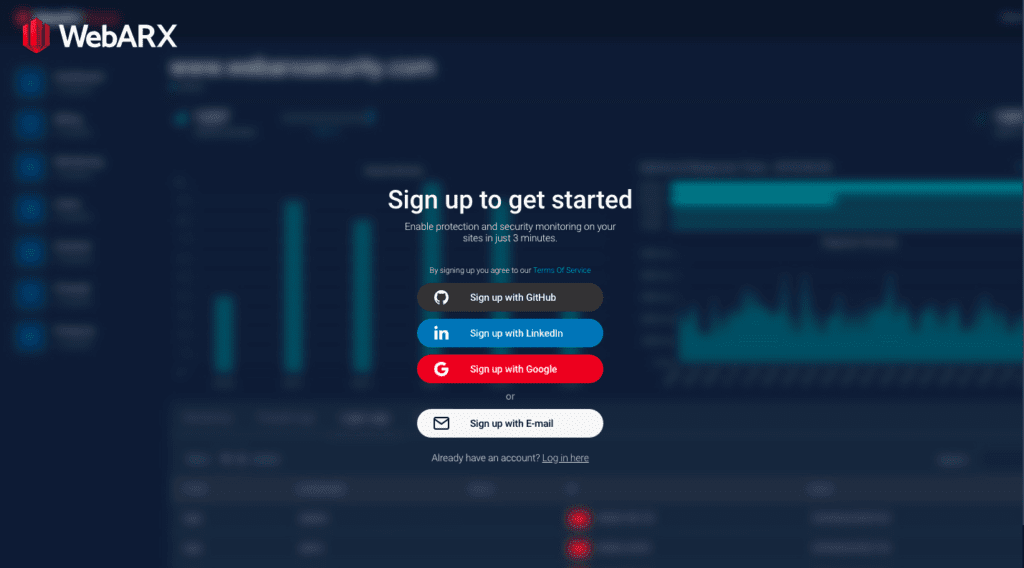
The first step is to make an account in WebARX Portal. You can start the sign-up process by clicking here.
If you have an account in GitHub, LinkedIn or Google, you can easily sign-up via these options but you can also sign-up using your email.
If you have already made an account you can log in by clicking the option on the very bottom or you can click here.
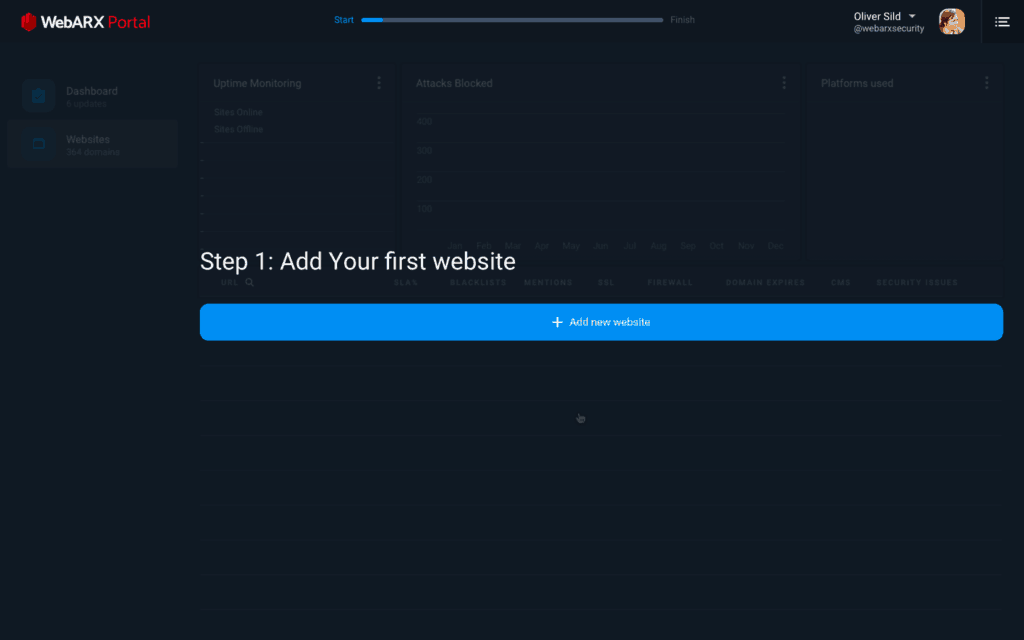
Add your website
The very first thing after signing up to WebARX Portal will be adding your first WordPress site. To secure your WordPress site you should click the blue button “+Add new website“.
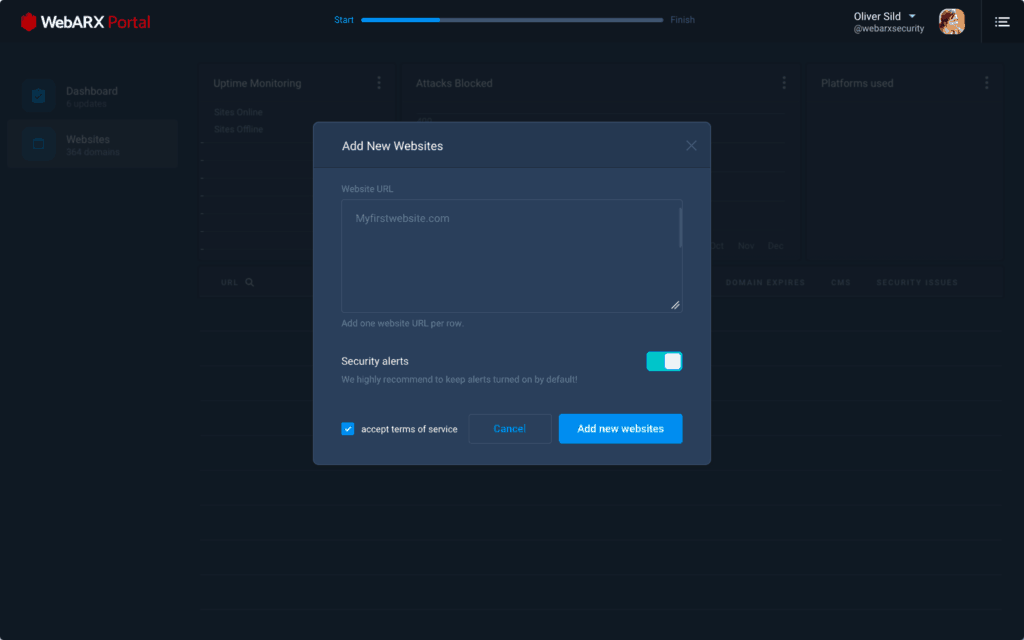
You can add more than one site by adding one website URL per row. Make sure your websites are written correctly. When you have added your site(s) then click “Add new websites“.
After you have added your site it will take roughly 10 minutes before data starts showing up on the dashboard and on the individual site view page. In order to see data of a specific site, scroll down on the dashboard and click on your site in the sites overview table.
Installing the Firewall to your WordPress site
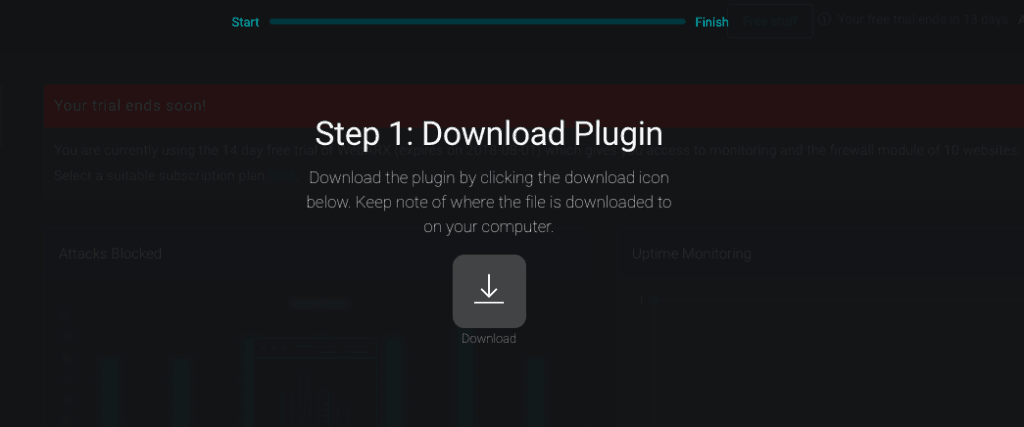
Now to the next step – downloading the plugin to your WordPress site.

For downloading and enabling *WebARX Firewall click on the white slider under ‘FIREWALL’. And you should see a page like that:
Now click the gray icon, to download your plugin. Make sure you check where do you download the .ZIP file so you could easily find it later when you add it on your WordPress site.
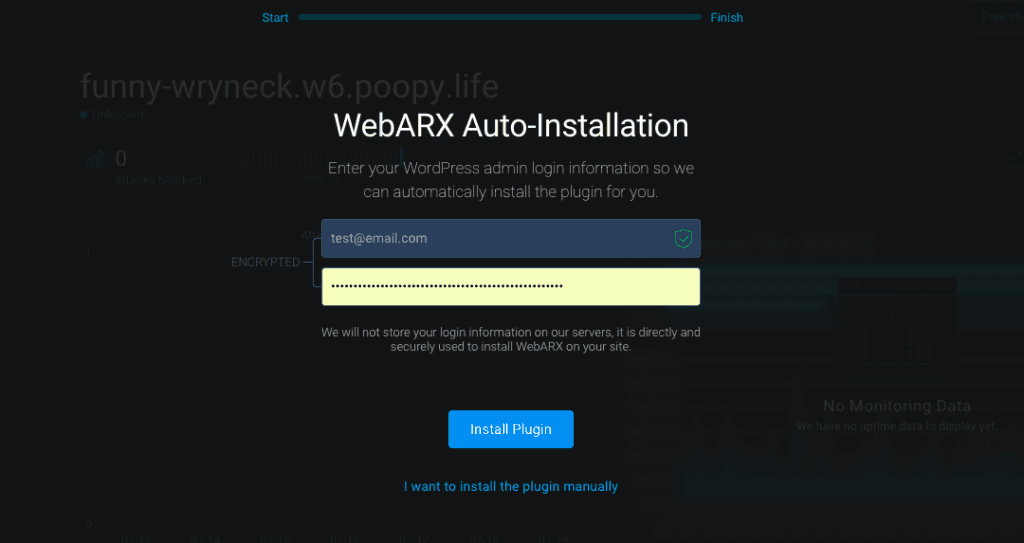
Here you’ll have two options:
- Install the plugin automatically by entering your WordPress login information. (Keep in mind that we don’t store your login information on our servers, it is directly and securely used to install WebARX on your site.) If you have installed the plugin allow it to configure itself by waiting 5 to 15 minutes before everything is synchronized with the portal.
- Do it manually by clicking “I want to install the plugin manually.”If you choose to do it manually then continue with the tutorial, if not go directly to “Great, now you’re protected with WebARX!”
Now log in to your WordPress site
The next step is to log in to your WordPress site. At the menu on the left click on Plugins, press Add New and then click on Upload Plugin.
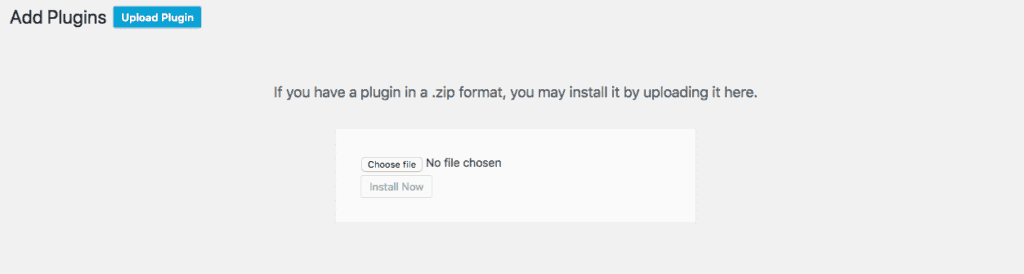
Installing the plugin is really simple. Click on “Choose file” and select the .ZIP file you downloaded from the Portal earlier. Then click “Install Now”.
As the final step, you only need to click “Activate Plugin” which will connect your website with WebARX. It will configure everything automatically and enable a dashboard widget so you can see logs and statistics on your WordPress dashboard.
Great, now you’re protected with WebARX!
If you followed every step – your website is now connected and protected with a Web Application Firewall.
The Web Application Firewall is updated in real time and it will be updated against the latest threat signatures automatically. It will block malicious traffic, hacking attempts and even spam. It can sometimes be surprising how many attacks are actually made and how many different IP addresses try to find weaknesses on the website.
You can see from the single site view – Firewall logs, Activity logs, and Software. This is where you can see if someone has tried to attack your site or who has logged in. Software tab will show you what software is installed and if any of them are vulnerable or known to be exploited.
Our next article will cover our favourite website security heavyweight, which also happens to be our go-to solution for high-traffic websites that get a lot of bad attention. I am talking about DDoS protection and for there are only really only two names to mention when it comes to that, so check back next time to find out what company Raven Web Services uses for DDoS protection and why.